Recipe Book

My very own recipe compilation of Anti inflammatory and healing foods and meals. Nutrient dense meals ready to rock your mind, body and kitchen. With some helpful info along the way...

Search by the tags for a quick list of meals that suit your lifestyle.

Baby Food - Pear, Pea & Chia

IMG_0191.jpg

Whenever I take pictures of my food for my recipe collection, it takes me a while... This time, a while is an understatement! 

You and I both know that making baby food puree look good is well, nearly impossible. So apart from the fact that this colour green is just divine, please excuse that it isn't a fancy photo that it doesn't exactly make you want to don your apron and get cooking.

I have six month old twins... well seven months in a few days, and I also have a 3 year old.  I remember from when my eldest was an only child and we were introducing solids, the amount of conflicting information there is out there. I was left so confused and worried if I was doing the right thing! 

There were so many do's and don'ts and not this till this age and don't have this till that age.... JESUS! No wonder intolerance is on the rise! Apart from Honey ( for the botulism factor ) I thought -Fuck it! (excuse my language) but I'm just going to feed them what the damn hell I like and I'll deal with the consequences. If it makes them sick, windy, itchy, sad - then I just won't make that again. So this is the mantra I lived by when I was feeding my first born and introducing him to solids. I have to tell you - I am one of the only mummas I know that doesn't have a picky eater. My boy would eat the arse out of a horse if I let him, and is happy at dinner to sit down to a plate of salad with olive oil dressing, munch on radish and carrots during the day for a snack, and will happily hoe into a raw sweet potato like an apple. In short, he LOVES his food! So I am doing it again. I am not following all the 'rules' and I'm feeding my kids in short - Wholesome, healthy foods, the way god intended... mostly raw. 

I was told not to do Chia seeds before 8 months and not raw veg. Sorry. But no! Not for me. My babies live on 80% raw foods and 20% cooked. They have no dairy ( myself and my son are allergic and the twins have had similar signs of the allergy - but get ready to hate me all you 'dairy is the best source of calcium people' because even if there were no issues, I wouldn't feed it to them any way... my children are human, not bovine). I am coeliac, as well as my first born... and I HATE Gluten because of the way it is now produced and that it literally comes with no fibre and therefore sets in the digestive tract like glue (don't get me started on that) so they only have Barley, Rye and Spelt when it comes to Gluten and I only do it because I don't want to create unnecessary intolerance if it can be avoided. 

So what do we eat I keep being asked by the MCHN ( Maternal Child Health Nurse ). We eat whole foods. 80% Plant Based and 20% Meat and Raw whenever possible. That's Fish, Meat, Nuts, Seeds, Eggs, Vegetables and Fruit. And we NEVER go without! Our meals are always so full of flavour that I don't understand how some people can live on the shit that is in the supermarket these days. 

So this is what I figured I would live by with my kids. At the end of the day, I know what health looks like when it comes to food, so I will feed them what I see fit, instead of following rules and stressing myself about things that may not even happen. I have to tell you. My twins now with this mantra are LOVING their food most of which is raw and they're just little perfect pictures of health. 

That's when I thought I'd share my recipes for baby foods. To help the mums that are over all the conflicting information. To help the mums that are concerned about what's healthy and what's not. To help the mums that don't have much time and can't sit and cook and puree every. little. fruit. and. vegetable. This is for you. I am time poor, Three children, two adults, 3 loads of washing a day, Constant dishes, playing, learning, running a business. Let me tell you and take a load off your shoulders, not only is Raw food easy - It is SO healthy!

When you cook food, it loses the nutrient content. It also breaks down the fibres in the fruit and vegetables that are fantastic for feeding the micro biome in our gut because a lot of those fibres and starches that are raw are resistant and reach the lower intestinal tract. Our gut bacteria need this to survive, flourish and multiple and create different species to ward off diseases and bugs. 

The most important thing I believe when it comes to your children and feeding them raw, is buy organic if you eat the skin, and just wash it well. We don't need to be taxing their poor little livers by flooding their helpless bodies with pesticides and all the chemicals that are on fruit and veggies these days. 

Of course I'm not a doctor and if you decide to try these recipes it is completely on your own accord, but I feed this to my children every day and they are blossoming, bright and just beautiful. 

I was told not to give chia seeds until 8 months, which is so frustrating! They're such a good source of fats which is so good for developing brains, amazing source of fibre AND they are really awesome at helping make that transition from completely puree'd food, to food with small lumps. It can be sweet, savoury you name it. This is why I love Chia and decided against listening to our severely over weight MCHN and began feeding it to my babes at 6 months. 

The key is the ratio. They say 8 months because it can bind them up. So, I just quarter the ratio and it's perfect. It has even helped to regulate my little boy's bowels (the eldest of the twins).

So I hope you like this recipe. I know your babies will. You can rest well knowing that you have fed them something nutritious and good for them while knowing that other mums feed their kids raw foods, and it's ok! and it's even better, because it takes 5 minutes. 

Rest Well Mumma, Rest Well. 


Recipe

Serves - 4-6 depending on age - 

Time - 10 Minutes - 


What you need:

1 Organic Ripe Pear

1/4 Cup Organic Peas ( Frozen works too ) 

1/4 Cup Filtered Water

1 Teaspoon Chia Seeds. 


What to do:

Place Pear, Peas and Filtered water into a blender ( I use a Nutri Ninja ) and blend depending on the age of your child. For my six month old twins I pulse until the peas are blended, but still have some small chunks. 

Take the lid off and add in your teaspoon of Chia Seeds. Put the lid back on and shake to mix the seeds throughout. Place into the fridge for 4 Hours for the Chia to absorb some of the water. 

Portion, and place in the fridge (if you will use it all the day you make it, or the following day) otherwise freeze in baby freezer pots. 

Easy. Tasty. Healthy. 

Here are my darlings enjoying their Pea, Pear and Chia 

IMG_0195.jpg
IMG_0197.jpg
IMG_0197.jpg


Turmeric Choc Chip Cookies - Paleo

IMG_8219.JPG

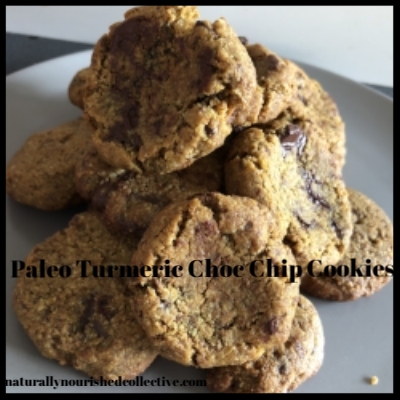
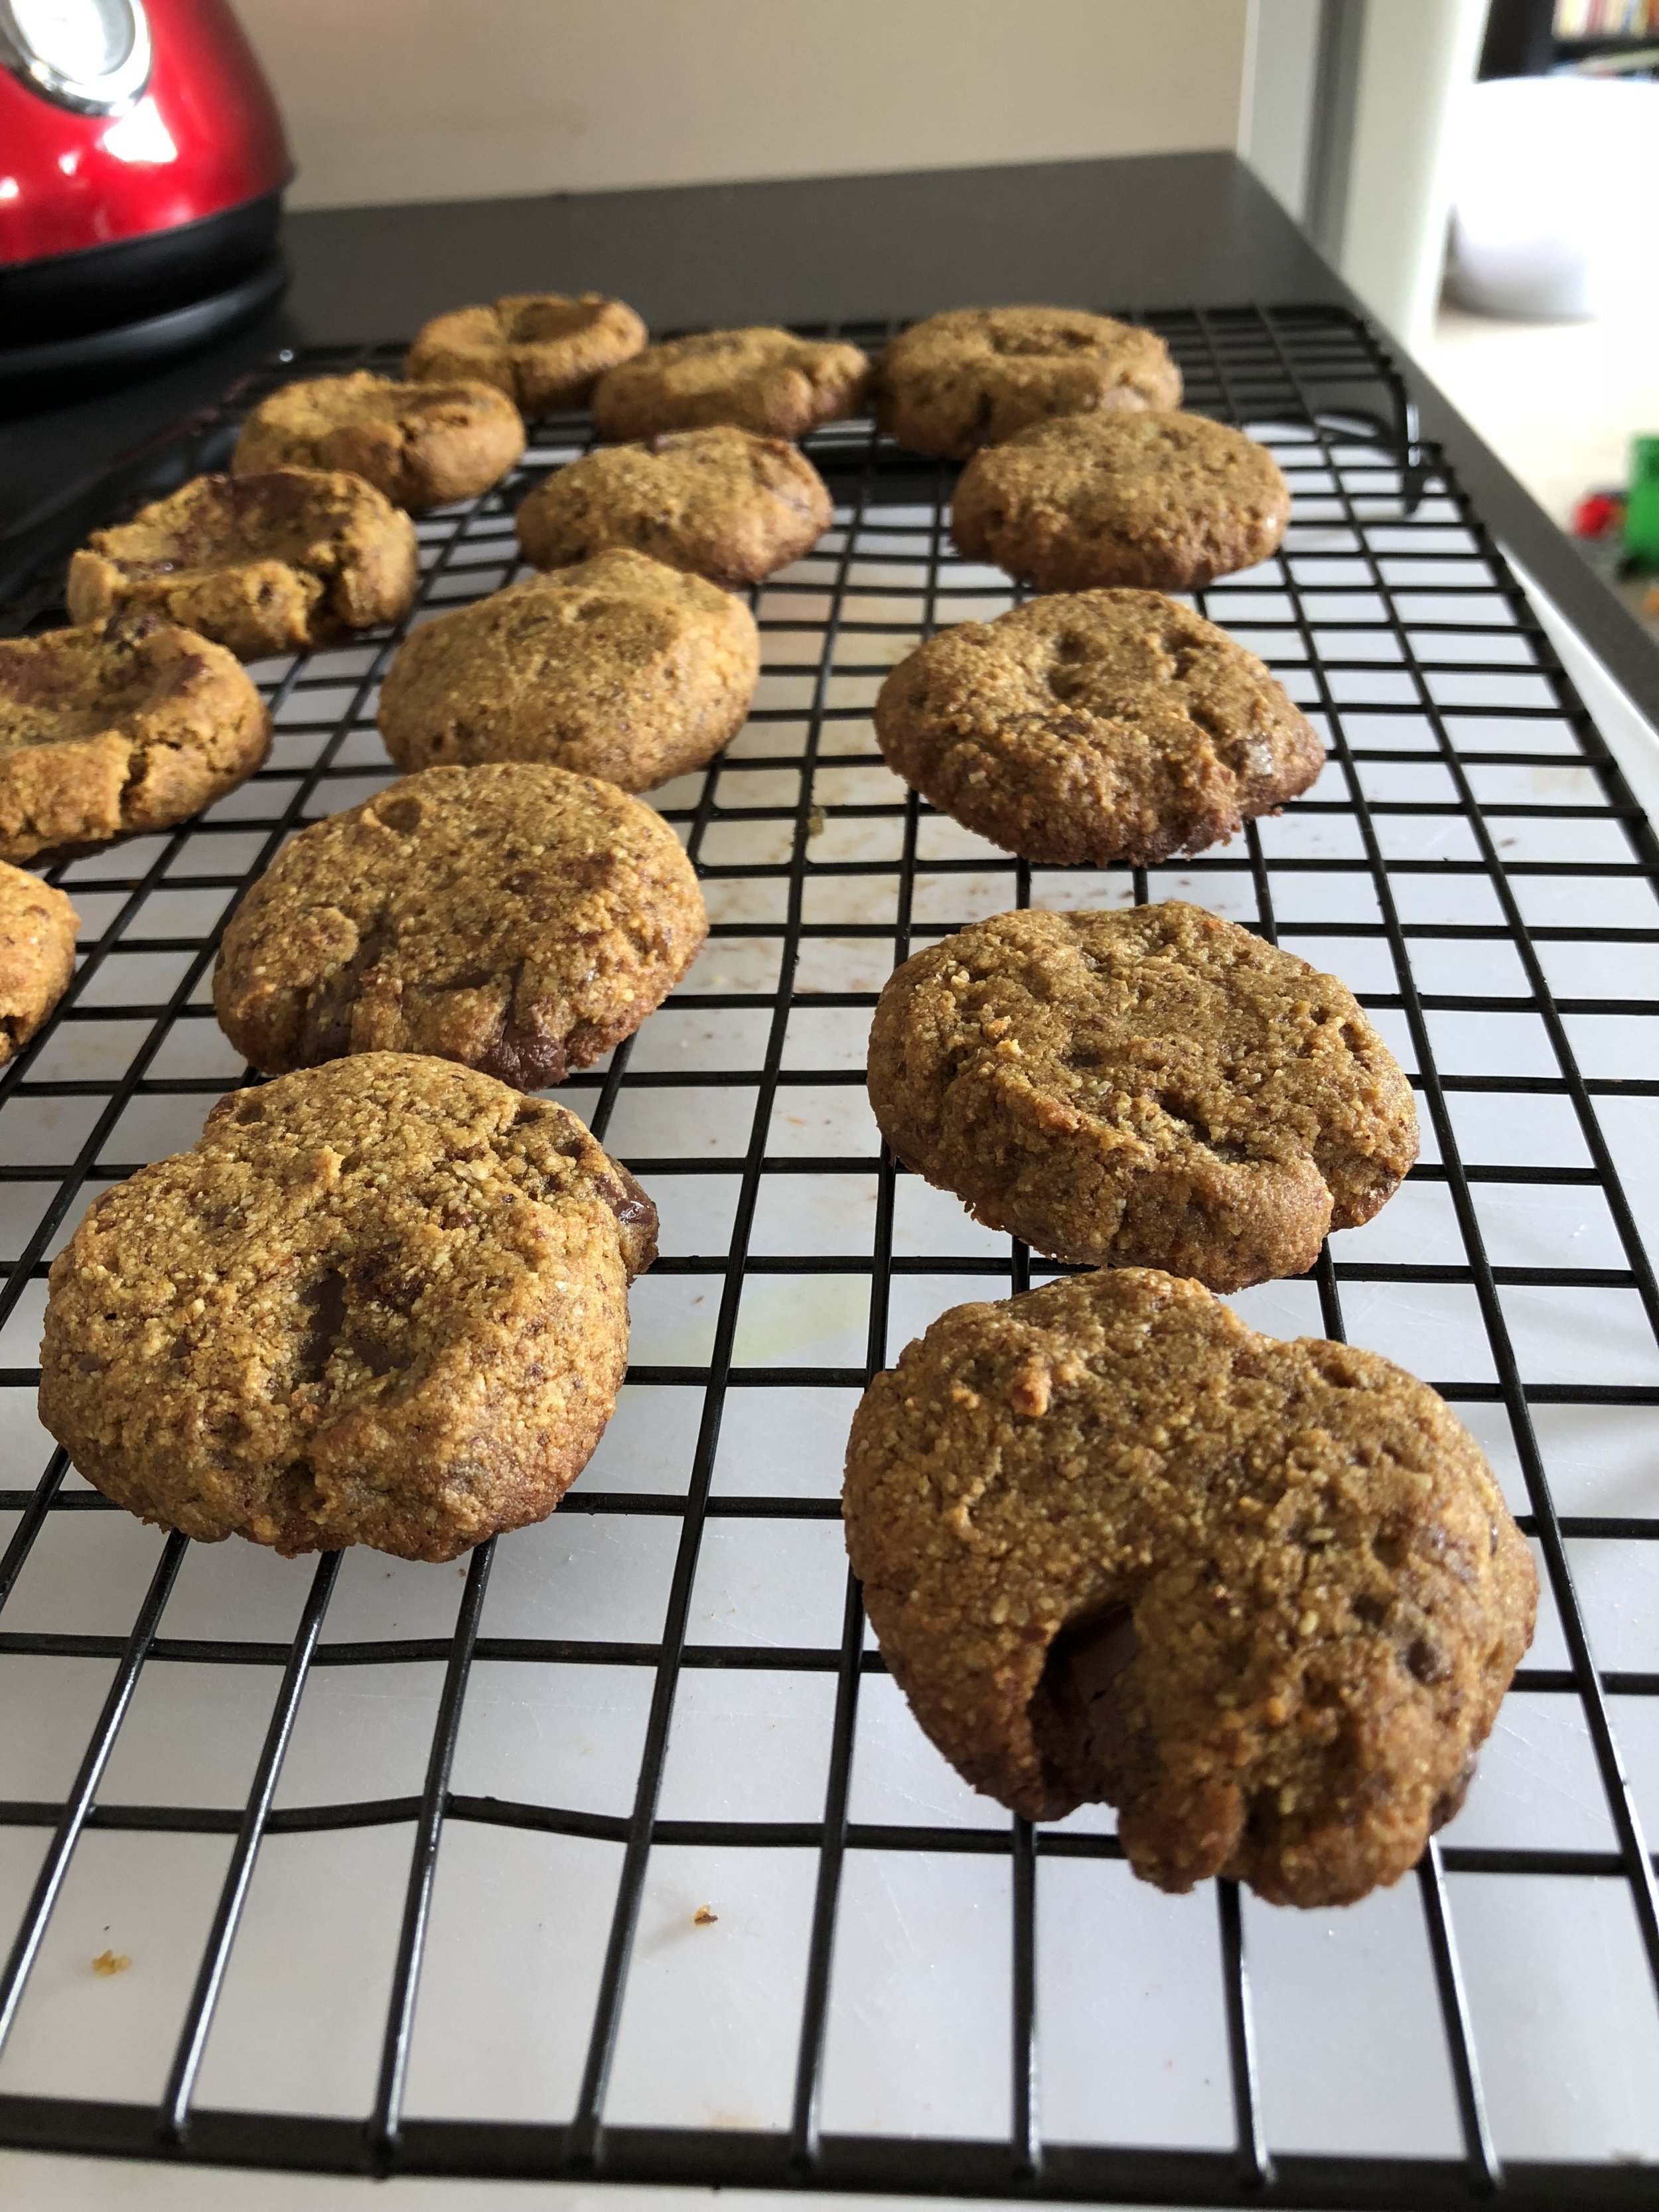
YUM! I am SO excited to share this recipe with you! It was a bit of a fluke which makes it all the more exciting! These turned out so deliciously chewy I had to be careful we didn't eat them all at once! 

So today while the whole of the nation were engrossed in the horrible cruelty filled day that is horse racing (it's Melbourne cup day), I decided to have a date with my kitchen and do something that makes my heart and soul sing, instead of make my heart ache and break in half which is what seeing those poor horses be whipped does to me. 

So I turned off all Social Media, TV, Music and I was just at one with the baking. It must have done me well because this recipe worked like a treat (and to be honest... I have never made cookies before so it was a gamble!)

If you have recently seen the front page of my website, you will notice if you scroll right to the bottom that every now and then we have a quote by someone amazing in the land of natural health. Today I changed it to "Every time you Eat or drink, you are either feeding disease or fighting it". Since being diagnosed with Hashimotos Auto Immune thyroid disease, this is the mantra I live by. Everything that I put in my mouth - and my families mouth, I want to benefit us. This is why these cookies are filled with good fats, anti inflammatory ingredients, pre biotics and Turmeric. 

Having an Auto immune disease puts me at higher risk for inflammation within my body, and also means that my children have a pre disposition to developing the same disease, if not others. Therefore I take the Food As Medicine principle very serious in our house. That was the driving force behind adding Turmeric into the cookies. I didn't want to add pepper which you should normally do when consuming Turmeric ( It increases the Bio Availability of the Curcurmin ) as the cookies really aren't very sweet anyway. So I added the Cinnamon to aid in absorption of the anti inflammatory benefits of the curcurmin. 

When you are buying Turmeric, It will really see you well to buy a good quality product. You want to aim for 4-5 % Curcurmin. Curcurmin is the yellow pigment in Turmeric which is where all the health benefits lie. You can usually get a good grade Turmeric from your local health food store. You can use supermarket turmeric... but ... with all the processing that foods go through, I wouldn't trust it and the curcurmin value is quite low. You can tell this by the light colour that it is. 4-5 % Curcurmin is a really really deep gold colour. Just beautiful. 

I often cook with Turmeric. So much that I barely have a white shirt that doesn't have yellow stains. But as you know, the minute you apply heat to anything, it loses nutrient value. This is why I try to add it into so much that we consume... although weirdly enough.. this is the only recipe it is in so far in my blogged recipes! I'll have to blog the recipe for my Veggie turmeric curry. It really is a winner! 

IMG_8068.JPG

Anyway, it's cookies for now! I look forward to sitting tonight once the tribe are in bed, and enjoying a warm Golden Milk Latte with a couple of cookies. I have a mad fascination with Channel 33 ( The Food Channel ) and my SB ( Secret Behaviour ) when no one is home or awake is sitting with good food, a great drink and watching the food channel. It is pure decadence. Mind you... I spend most of my time criticising the chefs for cooking unhealthy foods, and one woman in particular who thinks she's super healthy but the recipes are really just junk food. So that's me in spare time. I criticise people and eat food.... hahahahahahah. Seriously though if you're a foodie like me you probably would be doing the exact same thing.

SO enjoy! As per usual... let me know what you think if you give the recipe a go. And don't forget to share with your friends and family! This is a great alternative for little tikes birthday parties instead of all the processed sugar filled crap on the shelves! Happy Baking!


Recipe

Serves - 8 - 

Time 45 Minutes

What you need:

Baking Sheet and Baking Paper

Hand or Stand Mixer

1 1/4 cup almond flour

1 Tablespoon coconut flour

1 1/2 teaspoons baking powder

1/2 teaspoon salt

1/3 Cup coconut sugar ( I did between 1/3 Cup and 1/4 Cup )

6 tablespoons Coconut Oil ( Room Temperature )

1 teaspoon mollasses

1 large egg

4 Lines 85% Dark Loving Earth Vegan chocolate

1/2 teaspoon cinnamon

1/2 teaspoon Turmeric.


What to do:

Preheat your oven to 180 Degrees Celsius and line a Baking sheet with Baking Paper. 

In a stand mixer ( or hand mixer ) mix the Coconut Oil and Coconut Sugar until well combined. Once combined, add the egg and molasses and whip again until well combined.

In a separate bowl, combine all the dry ingredients. Almond Flour, Coconut Flour, Salt, Baking Powder, Turmeric, and Cinnamon. With a wooden spoon mix until combined. 

With your Vegan chocolate, chop to chunk size pieces. 

Incorporate your dry ingredients to your wet ingredients with the mixer on low speed. Once all of the dry ingredients are in the bowl, turn to a medium speed and mix well until combined. 

Once combined, remove the bowl from the stand mixer and stir in chocolate chips

Scoop a teaspoon size of dough and roll between your hands, then push down with your thumb in the middle and place on the baking tray about an inch apart. 

IMG_8914.JPG

In 180 degree oven bake for 10 minutes or until the bottoms are golden. 

Remove from oven and let cool for five minutes on the baking sheet, and then transfer to cooling rack. 

Let sit until firm. They will be chewy and delicious in no time! 


------->

This is my little Cookie tester and Model. Pretty Cute huh :)

IMG_0197.jpg

Healthy 10 Minute Pasta - For Kids!

IMG_7167.JPG

I think every parent has those days where you really CBF cooking... to the point that you're not even phased if you don't eat yourself. But then you remember that you have little humans that rely on you, and you can't just Not Adult... so you get your bum off the couch and make something simple. Maybe Toast. Maybe Eggs. Maybe even a bowl of cereal...perhaps you even opt for the greasiest and just do a take away night! After all... kids don't really mind do they? But for the rest of the night you feel a little bit guilty inside that you haven't fed them something as nutritious as what you probably could have. 

Well I don't know about you, but I felt like this  A LOT when I was pregnant with the twins and I still had to feed my 2 year old... and I'd been working all day. Because we follow an anti inflammatory lifestyle here, and we have many intolerances/don't keep junk food in the house and I refuse to give my family nasty cheap food - our take away is usually grill'd burgers. And believe me when I say - Holy shit that gets expensive! $50 minimum on takeaway to feed three of us... and because I could barely walk from being pregnant with twins, sadly this happened around 2-3 times a week. Bye Bye Money. I was like Beyonce throwing money at Maids... but I was throwing money at the waiters at Grill'd and making them feed me. 

So if you're a mum... a dad... a grand parent.. or a special person... and just want to SIT DOWN... may I suggest that you try this 10 minute pasta! Truth is, it only takes 10 minutes because that's how long the pasta takes to cook. The sauce itself is literally done in 5 minutes! You don't even have to chop anything. All you need is a blender or food processor... and a saucepan for the pasta of choice. 

We use Orgran Gluten Free Pasta for our son, Seth. It's made from Rice and Corn (I know not anti inflammatory however it does the job as a once off every now and then) and it comes in fun shapes! The pic above is their 'Out Back' animals pasta and Seth loves going through and looking at the Koala's and Kangaroos. So it's super fun for the tots! Not to mention, they also include spinach and other veggies in the pasta to make it fun colours. The sauce is also considered raw which is great because it means the nutrients in the vegetables are still intact and therefore packs a great nutritional punch. 

We don't eat dairy in this house, and the substitute I LOVE when it comes to cheese on pasta is Nutritional Yeast! It has the most wonderfully cheesy flavour but is packed with Protein and B Vitamins! I highly recommend it. Little mate thinks it's cheese ( the poor love haha) so he always asks for it on his meals. It really does contain great nutritional value and it's quite well priced! I usually use the Bragg's Nutritional Yeast, however Wholefood Merchants were out of Bragg's this fortnight so I am trying the Lotus brand... tastes the same and was a bit cheaper which is a win!

So here you go. Some relief for parents EVERYWHERE! It doesn't look the prettiest.. but hey it's gunna come out looking much worse... amirite?

As usual, let me know how you go if you give it a try and let me know what your little ones think! It really packs a punch of flavour and hey - why not even mix it through some Quinoa pasta for an easy meal for yourself?


Recipe

Serves - 2 - 

Time 10 Minutes

What you need:

Blender/NutriBullet/Food processor 

1 Organic Tomato

1 Clove Garlic

1 Handful Spinach Leaves

1 Teaspoon Tomato Paste

1/6 of an Onion (literally just a couple of Rings)

1/2 Teaspoon Italian Herbs (Oregano or Basil will work too)

1 Tablespoon Olive Oil

Nutritional Yeast

Salt & Pepper

1 Cup Animal Pasta (=2 Serves for small People)


What to do:

Put a saucepan of Water on and cook Pasta as per your Pasta packet instructions.      

While the water is boiling, in your blender add your Tomato, Spinach, Garlic, Onion, Herbs, Tomato Paste and tablespoon of Olive Oil and a pinch of Salt & Pepper. Blend until all combined. 

Once the pasta is cooked, scoop 1/2 cup of the Pasta water out and keep it in a cup to the side and then drain the Pasta.

Once the Pasta is drained, add it back to the Pot and pour the Sauce from the blender over the pasta. Mix well and then add the half a cup of pasta water. This will thin the sauce out and ensure it evenly covers the pasta. 

Serve into the bowls and top with Nutritional Yeast and Voila! 


I told you it was simple, didn't I? xx   

fullsizeoutput_2a.jpeg


Stupid Easy Mexican Corn

IMG_5565.JPG

I think most of you mums and dads out there would agree that dinner time can be a battle...and it's hard to find something that the whole family will enjoy, that is also simple, as well as being cost effective AND healthy.

In Paleo land I understand that Corn is a big no no because it's a grain and there's no grains allowed on the Paleo diet...I have been strict Paleo for nearing three years now. But when it comes to a treat, there are a lot worse things you could be consuming other than corn. 

Grains aren't a highly valuable source of nutrients and have a high glycemic index which means it spikes blood sugar. A lot of people are also unknowingly unable to digest grains which leads to things like Leaky Gut. But if you are out at a BBQ and there's no other food choices... having an ear of corn isn't going to kill you.

Corn does pack some nutrients although as they are harder on digestion to break down, the nutrients are somewhat lost. They are richer in nutrients though than some other grains. It is rich in phytonutrients like Ferulic acid, Beta-carotene, vanillin acid, coumaric acid, caffeic acid and syringic acid and it is also a source of phosphorous, niacin, dietary fibre, manganese and vitamin B6. The issue being that corn can get through the digestive track un digested which means you don't absorb a lot of those nutrients compared to other fruits and vegetables. But all of this aside, we feed grains to our live stock to fatten them up... so don't think consuming it regularly is going to help your waistline. It can certainly be inflammatory so don't consume it if you usually have any bloating after eating it. 

But hey! In summer, when firing up the barbie, I say theres nothing better than an Ear of corn smothered in Ghee with some beautiful spices!

This recipe you can do if you Steam your Corn, however, putting in foil in the oven or on the bbq makes it taste so much nicer! The base of the corn that is on the pan goes caramelised and adds a beautiful sweet flavour which is beautifully contrasted with the Lime juice. 

Enjoy, and as always - please let me know what you think in the comments below! If you like it please share with your friends and pin it to make again!


Recipe

Serves - 4 - 

Time - 1.25 hours if roasting, 45 minutes if steaming


What you need:

3 Ears Of Corn

1/2 Teaspoon Cumin

1/2 Teaspoon Smoked Paprika

1 Sprig Rosemary

Juice of 1 Lime

1 Clove Garlic - Minced

1/4 Cup Melted Ghee (Can sub for Olive Oil)

Baking Sheet

Foil


What to do:

Preheat the oven to 180 degrees Celsius. 

Grab a baking sheet. Cut your Ears of Corn in halves. Wrap each half in Foil and place on the baking sheet and put into the oven for 45 minutes. 

While the corn is cooking, in a saucepan melt your oil of choice or ghee. When it's all melted add the Cumin and Paprika. Cook the spices until aromatic (usually 1-2 minutes) and then add the garlic and turn off the heat. Add the Lime Juice (if the lime isn't particularly Juicy, add another Lime), Rosemary and Salt and Pepper. 

After 45 minutes, take the corn out of the oven. Be careful not to tear the foil when unwrapping. Baste the corn with your mix, wrap the corn and place back in the oven for 15 minutes. 

Take the Corn out of the oven and out of the foil and place in a bowl. Pour the mixture over the corn and serve family style in the middle of the table. 

Delish!


IMG_0197.jpg