Recipe Book

My very own recipe compilation of Anti inflammatory and healing foods and meals. Nutrient dense meals ready to rock your mind, body and kitchen. With some helpful info along the way...

Search by the tags for a quick list of meals that suit your lifestyle.

Passionfruit & Pomegranate Snack Cup - Paleo, Keto, GF, SF, DF

***This post contains affiliate links which means we may earn a small commission at no extra cost to you if you make a purchase, but thats ok, because we only advertise businesses from our collective that meet our strict health guidelines...and it's…

***This post contains affiliate links which means we may earn a small commission at no extra cost to you if you make a purchase, but thats ok, because we only advertise businesses from our collective that meet our strict health guidelines...and it's what keeps our page up and running***

I have to admit, lately I've been kinda getting over the "meat and veg" part of my lifestyle. Don't get me wrong, I still love this way of eating, but every now and then, just like every one else mumma craves something a little more decadent, and a little more 'naughty'. I don't like naughty food though so this was something awesome to make that feels naughty ... without it actually being naughty. I just said naughty way too much... but I think you get what I mean yeah?

To be fair, this isn't exactly a 'recipe' because it is literally so super simple - it is more of a food idea to give you something else to hide up your sleeve for the days where your basic meals just won't cut it... or if you are perhaps having people over for dinner, and you don't want to miss out on desert. Although I think we are all old enough and ugly enough to hear the ugly truth - you can celebrate and catch up with people WITHOUT feeding your face - but - who am I to judge... if you would like something to take the edge off, or in fact celebrate by spooning delicious things into your mouth cavity, here it is. 

This differs from a lot of the other 'treat' keto recipes you'll find for a few reasons. The first one being that this sexiness in a cup jar thing, is actually quite nutritionally dense. This recipe doesn't rely on artificial sweeteners and fake flavours to make it tasty. The flavours come from fresh seed fruit (relatively low in carbs because they aren't generally foods you would sit down and eat 100's of grams of) and a Fermented Paleo Protein powder - I use RAW Fermented Paleo Protein Powder which you can get if you click HERE.  I urge you to please not choose a whey protein powder. Choose a plant protein powder or a flavourless beef protein powder. Dairy is a known inflammatory trigger when it comes to everyone's health, largely contributing to the rise in chronic health conditions around the world. Did you know - The countries with the largest dairy consumption, also have the highest reported cases of osteoporosis? That's not a coincidence. Consumption of dairy can cause a state of metabolic acidosis. In order to neutralise the acidic environment, the body releases calcium stores from the largest known source which is the bones. Pairing this with the hormones in dairy which actually hinder the absorption of the calcium that is found in dairy products (despite marketing gurus drilling it into us for DECADES that we should drink this white bovine hormone secretion because it is the best form of dietary calcium) means your body is left depleted of its stores which leads to the bone crushing condition. After digestion, absorption, and metabolism, nearly all foods release either acid or bicarbonate (base) into the systemiccirculation. Dairy is net acid producing. You're really hungry for cow puss now aren't you? Wait, I mean dairy?

HealthPost natural supplements and skincare

The second reason this beautiful little delight differs to other 'ketofied treats' is because most other keto-crap (as I like to call it) is all fat, otherwise known as 'Fat bombs'. Yeah great, they may serve their purpose if you follow medical ketosis, but if your goal is Fat Loss, you want to have a calorie deficit from your fat macro, so your body burns your own stores... ie - If you have fat on your hips, you don't put it on your plate. This is why this recipe is good. It is not overly fatty and therefore is a perfect fit for nutritional ketosis. Because we are also using a protein powder instead of just fat upon fat, we are making sure that we are contributing to the protein macro which is the most important macro of them all. Without consuming adequate protein for our bodies Lean Body Mass, your body can burn its own muscle stores, including organs which is not a good thing! 

Let me get this straight through to you though yeah, because I feel like I can see your brain ticking going "eat MOAR BROTEIN? thats CRAZY! IT WILL TURN TO CAKE AND ALL MY HARD WORK WILL BE RUINED BECAUSE MOAR BROTEIN TURNS TO GLUCOSE!!!!!" So - before you go off on that tangent and start pulling your hair out (although if you don't eat adequate protein now, chances are that shits falling out by itself anyway) and hulking your way through the streets raging and stressing about eating more protein because you've heard how bad that is for you when keto from the several groups of uneducated butter chuggers that have weaselled their way into the keto world, you should know that the process is called gluconeogenesis, and this process is completely demand driven. This means your body will only turn protein to glycogen IF IT NEEDS TOO (and by the way, glycogen is ESSENTIAL for cognitive function...if you have NO glycogen, your brain can't function and you will die, ya hear?). This is why it is important to eat adequate protein per kilo of LBM, because if you don't eat it, and your body needs glycogen, it will result to burning your muscles and/or organs - turns out the bods pretty nifty hey?! So you heard it here.... don't be dumb... and don't be scared of eating protein. Ontop of this reason, protein is the most satiating macronutrient and aids in keeping your fuller for longer AND it is more nutritionally dense than fat, so eating adequate protein keto means you are also getting more Micronutrients, in your Macronutrients (more micros for your macros... get it get it?)

The third reason this little gem is different, is because it's anti inflammatory, and not filled with products that can be harmful to your health such as gluten, grains, dairy and refined sugars. Just because you think you need to lose weight, it doesn't mean you overlook your health. I know a lot of skinny people who eat like arse holes and are the farthest thing from being healthy. So remember, just because your thin, doesn't mean you are healthy. So eat well and make the best choices where you can. 

The Macros I will give you for this single serve please remember are singular to the products that I personally used. If you decide to use a different Coconut Yoghurt, protein powder etc then the macros will vary. So please try and enter them into your tracker (yes! your tracker, humans are terrible at portion control which is why so many of us got fat in the first place! so weigh and track your foods to save yourself from over eating) for the specific products that you use. However, If you decide you are going to use the products I used (which are listed below in the ingredients) the macros are : CARBS 12g FATS 14g PROTEIN 14g

If you are looking for support and information on a Ketogenic Diet - you can join our Facebook Groups Wholefood Keto  and Keto For Beginners Australia - and don't forget to Like and Follow us on Facebook and Instagram for more healthy healing recipes, our health and lifestyle blog and to be kept up to date with amazing new natural health businesses coming onto the market!


Recipe

Time - 5 Minutes - 

Serves - 1 - 

MACROS: CARBS 12g FATS 14g PROTEIN 14g

THESE MACROS ARE PRODUCT SPECIFIC AND NEED TO BE ENTERED BASED ON THE PRODUCTS YOU CHOOSE


fullsizeoutput_11bd.jpeg

What you need:

Mixing Bowl & Spatula

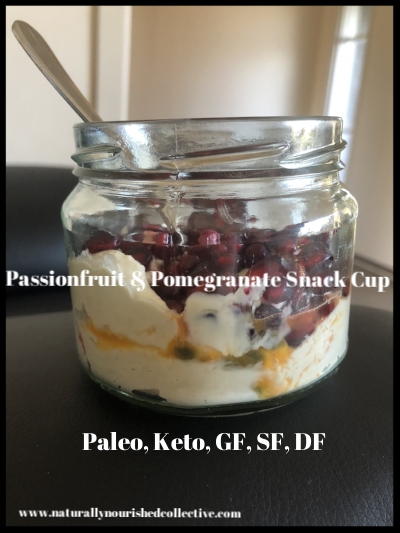
100g Nakula Natural Coconut Yoghurt

15g RAW Fermented Paleo Protein Powder (Half Serve) BUY IT HERE!

10g Organic Fresh Passionfruit

20g Organic Fresh Pomegranate


What to do:

Its really not rocket science this one!

Measure and weigh your yoghurt and your protein powder out, and mix together in the mixing bowl until thoroughly combined.

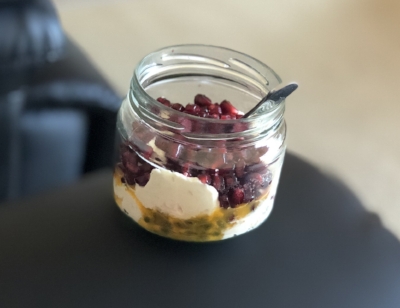
Place a layer in the bottom of your jar or cup, then add your measured passionfruit

Add another layer of yoghurt ontop of the passionfruit and then add the pomegranate on the top

best part : EAT IT!


fullsizeoutput_2a.jpeg


Chocolate & Peanut Butter Slice - Raw, Vegan, GF, DF, Refined Sugar Free, Paleo Option

***This post contains affiliate links which means we may earn a small commission at no extra cost to you if you make a purchase, but thats ok, because we only advertise businesses from our collective that meet our strict health guidelines...and it's…

***This post contains affiliate links which means we may earn a small commission at no extra cost to you if you make a purchase, but thats ok, because we only advertise businesses from our collective that meet our strict health guidelines...and it's what keeps our page up and running***

Dearly beloved, we are gathered here today to join this man (Chocolate) and this woman (Peanut Butter) in holy matrimony. 

Chocolate, do you take this nutty, smooth woman to be your wife, to live on top of her, to love her for her bold taste and ability to cause anaphylaxis, to honour her ability to be both sweet AND savoury, to comfort her when she's upset that he nearly killed a bunch of people, and to keep her in line to remain square, forsaking all others, until someone eats you? - 'I do'.

Peanut Butter, do you take this tall, dark, rich, smooth man to be your husband, to live together, underneath his thick gooey layer, to love his boldness to honor his status amongst chocolate lovers, to comfort him about his weight and ability to melt in the hot sun, and to keep him in deliciousness and in taste, forsaking all others, until someone eats you? - 'I do'

I feel like you're either laughing... or assuming I've just gone full retard here. But what can I say? The Royal Wedding has got me reminiscing of my own wedding, and made me so happy to see love being celebrated on the news and surroundings. Isn't it such a nice change of pace from all the war and hate that we see constantly broadcasted these days!? What a beautiful thing to be able to witness and see in our lifetimes - although I have to admit that it made me sad that Harry is now off the market. The only time I stood a chance with Harry, is if he tried my cooking haha. 

So anywayyyyy. You'll seriously want to get on board these bad boys! They are so good AAAAANNNNNDDDD if you're after a more protein filled source, you can sub the coconut flour for your protein powder to give them a bit of a nutritional boost. But, given this isn't a keto recipe and contains Agave Nectar (which is still a sugar) I prefer to keep the calories down. 

The good thing about this recipe is if Peanut Butter agrees with you, then you can use it, but if you prefer a paleo approach (We are a Paleo Household however every now and then I indulge in Peanut Butter) you can sub for any nut butter you like. I think these would be AMAZING if made with Hazelnut Butter! Who doesn't love Hazelnut and Chocolate? Yeah thats right, NO ONE and im pretty sure it's fair to say that if you know someone that doesn't like hazelnut and chocolate, that you need to remove them from your life IMMEDIATELY! 

Now obviously it's up to you to source some good vegan chocolate, and you are most welcome to use a brand that you personally love! I love Loving Earth's Dark Chocolate, so that's what I made these out of. But if there's something else you prefer, by all means, use that. I have tried to make something similar with Pana Chocolate Blocks, however it just didn't work. The Pana split and went all funky. To keep this recipe raw, and given that the lovely folks at Loving Earth put in a lot of effort to make such a delicious raw product, I think it's only fair that we don't ruin that hard work by over heating this delicious product and ruining what they have tried so hard to preserve. Heating foods internal temperature above 41.7 degrees Celsius starts to ruin the health benefits of many of the foods we consume. So where ever you can, it is beneficial for health to consume as many raw products as possible. Heat destroys foods nutrients and natural enzymes, which is bad because enzymes boost digestion and fight chronic disease so where you can, give your oven and stove a rest, and eat raw foods. 

So that being said, melting this chocolate and keeping it in it's raw state is a little fiddly. But you can do it! So follow the recipe as close you can and keep a thermometer at hand. 

So on with the show. As per usual, leave me a message if you make this and let me know what you think. I'd love your thoughts. 

Don't forget to - Make, Enjoy, Love & Share. xxx


Recipe

Serves - 10 - 

Time - 45 Minutes to make, Plus Chill Time - 


What you need:

For the Base:

High Speed Food Processor

Square Dish & Baking Paper

Spatula

1 Cup Natural Peanut Butter or Nut Butter of Choice ( I made my own, but Mayver's is a great brand )

1/4 Cup Dark Agave Nectar ( You can Sub for Maple )

1/2 Cup Coconut Flour

Pinch Of Salt

1/2 Vanilla Pod ( Optional, but I highly Recommend! )


For the Chocolate:

Food Thermometer

Bowl & Saucepan ( or Double Boiler )

1.5 Cups Loving Earth Raw Dark Chocolate Squares

1/4 Cup Peanut Butter or Nut Butter of Choice

1/4 Cup Tahini

Pinch of Salt


What to do:

Line your baking dish with your baking paper first, and set it to the side so you are ready to rock. 

Make the Base first - so in the food processor place in all the ingredients for the base except the agave syrup. Turn the processor on. The Mixture should start dry, and add the syrup slowly until it resembles a thicker form of cake batter. It should be spreadable, but not loose. If your mixture becomes loose before you use up all your agave, then thats great! Stop there. 

Using the Spatula, spread it into your baking dish so that it is one even layer and place in the fridge to cool.

Now we need to make our Chocolate Layer.

Make sure your chocolate is Room Temperature before starting to limit the heat you need to melt it. Place water in the saucepan, and place onto the stove on a LOW HEAT. Place your bowl on the top and drop your chocolate in. Use the thermometer, and constantly stir to melt the chocolate. If you notice the heat of the melted chocolate getting to around 35 degrees C, Take the bowl off the top of the saucepan and stir vigorously to get the heat back down, then when the heat is down, place back on the saucepan. Once 3/4 of the chocolate is melted, turn the heat off and the residual heat will melt the rest.

Once melted, add the Peanut Butter, Tahini and Salt and mix until well combined.

Pull out the dish from the fridge and pour the chocolate over and spread with the spatula until evenly covered. 

You can dress the top however you like. I just sprinkled some Loving Earth Desiccated Coconut over the top. But let your imagination run wild with how you want to do it. 

Place it back in the fridge (NOT THE FREEZER as this can cause the choc to turn white) until set through. 

Once Cooled, take out of the baking dish, and slice the uneven edges off (and enjoy them in hiding before you serve the rest to everyone else ;) ) and then slice into Bars, or Squares or whatever you fancy. 

Enjoy!!!

fullsizeoutput_10d3.jpeg
8RsVTjrpRjuXkU46XcHkIA.jpg


Banana Cream Pie - Raw, Vegan, Paleo

IMG_1062.JPG

Well while todays kitchen made something sweet, it comes with a heavy heart... haha that makes this recipe sound so much sadder than it should.

Today I baked myself a cake... a cake for my birthday. Ok, not really a cake, a pie really. But still, I made it for myself because *sigh* I turn 30 tomorrow. I know those of you that are older than me will say "that's still young" or "I loved my 30's" and I get that... but don't forget you probably also felt a little odd finally hitting your 30's as well. I just really don't understand how time flies so quickly! It really feels like in a flash the last 10 years have darted past me and I've just been standing here watching it happen. I have achieved SO much in the last 6 years alone though and I have SO much to be grateful for... I guess it just feels like the end of an era. Tomorrow I will wake up and no longer be in the bracket 18-29.... I will be in the next bracket when I tick boxes on forms - 30-40. And that, my friends, feels like a shock!

So! As I usually do when I get a little sad, I take to the kitchen and remind myself, that even when I'm old... I'm a bloody amazing cook *insert cheeky face here*. But seriously... every time I'm feeling down... the kitchen has an amazing way of bringing me back down to earth and re energising me. There's something really beautiful and calming about cooking and baking. Taking chances on new recipes, trying other peoples amazing recipes, just throwing caution to the wind and whacking anything together and seeing what happens. While the risk may be small, it still makes the day that bit more exciting to see how or if something will work out and when it does, watching my amazing family enjoy the food I make, really makes my heart and soul warm, fuzzy and happy. 

It goes without saying that If I have to turn 30, then I'm eating cake... and I will eat as much cake as I like... cake for breakfast, cake for morning tea, lunch, in the bath, with wine, after dinner, in bed... you name it, tomorrow there will be cake in, on and around me. 

While I sat here this morning (wallowing in self pity of turning 30) and staring at the quickly ripening banana's on the kitchen table and thinking "I really got over excited with the amount of fruit I bought this fortnight", I also found myself slowly gathering random ingredients and grabbed the bananas. Truth be told, when I started making this, I was going to make a pudding... but when I have a bit of pent up frustration ( get your mind out of the gutter ) , I find that I need something to chew on, and that's when I decided to turn it into a pie and add a base. 

You could pop the base into the oven to crisp it up a little bit. That would actually be delicious. But I decided since there is a large likelihood of me eating a whole cake on my own tomorrow, that I had better keep as many nutrients in tact as possible so I'm not just eating empty calories. If you do decide to pop the base into the oven for the little bit, please let me know how it goes. I reckon it would taste amazing!

If you are a frequenter of this website, and have tried the Citrus 'Cheese'cake, you will notice that some of the ingredients here over lap with that recipe. I find that most raw cakes are usually made of the same base so it's not really a shock. Providing you have the flavour in mind that you want to use, you can pretty much adapt the cheese cake recipe to make anything you like and use the coconut oil as a lever as to how firm or soft you want the final product to be. Most of the difference in this pie versus the 'cheese' cake is the way it's presented, and that this has less coconut oil to make it not set as solid...also the fact that I have never had a banana cheese cake and I'm not too sure that it would taste particularly good!

Most of the ingredients for this recipe you will find in your pantry which is really handy! And those that aren't already in your pantry won't be hard to find at all. I do like to add Collagen and Pro Biotics to any of my recipes that are raw and remain in the fridge. As I have said before, I am a big believer in Food as Medicine and therefore like to add an extra nutritional boost wherever I can. If you are strictly Vegan, you can sub the collagen/gelatine for Agar Agar for a similar nutritional boost. I know that powdered pro biotic powder and collagen can be harder to come by, so you can purchase the powder I use HERE and you can purchase the Great Lakes Gelatin/Collagen supplement I use HERE. Of Course If you really don't want to add these products you don't have too. They make no difference in the structure of the pie, they are strictly there for nutritional value. 

While I was making this I was thinking that it would actually work to add a bit of turmeric as well...this of course will brighten the colour of the pie instead of it being the off - white colour that it is and also will pack a nutritional punch... but I decided against. The next time I make it I will add it and see how it goes. 

On the top of my pie in the picture you will see there is Raw Chocolate and Caramel. Those recipes are all my own recipes. You can access the Raw Chocolate recipe HERE and the Salted Caramel Recipe HERE. There is something about Bananas and caramel that just works, and adding the little bit of raw dark chocolate was great because having banana and caramel can be a little too sweet depending on your palate. You of course don't have to add anything to the top. It looks beautiful the way it is, but I was feeling fancy and for once I had some time up my sleeve to make it a little bit extra special!

So I've crapped on enough now, the recipe is below and as per usual... if you make it, chuck a comment below and shareeeee far and wide so others can enjoy some healthy deliciousness in their lives!


Recipe

Serves - 8 - 

Time - 45 Minutes - Plus setting time


What you Need:

Pyrex Pie Dish ( or any pie dish )

Crust:

220g Roasted Mixed Nuts ( or nuts of choice ) 

2 Tablespoons Raw Organic Maple Syrup

1 Tablespoon Melted Coconut Oil

1/2 Cup Fine Desiccated Coconut

2 Tablespoon Flaxseed

1/2 Teaspoon Cinnamon


Filling:

220g Raw Organic Cashews ( Soaked Over Night, or for non Raw Version, in boiling water for 1 hour )

Can of Coconut Cream ( In Fridge Over Night and drain Water, use solids that remains )

1 Over ripe Banana

1 Teaspoon Nutmeg

1 Teaspoon Cinnamon

2 Tablespoons Raw Organic Maple Syrup

1 Cup Melted Coconut Oil

Pinch of Salt

If adding - 2 Tablespoons Collagen or Agar Agar, 1 Teaspoon Pro Biotic Powder


What to do:


Crust:

In a Food processor ( I use the processor attachment on a Nutri ninja ) add all of the ingredients for the crust and process until combined. The Maple needs to be evenly combined amongst it all so it goes firm in the fridge. Don't pulverise until it goes liquid. You want there to still be some chunks to the nuts. Think Crushed nuts on the top of a sundae... that's the type of texture you want. 

Once everything is processed, push firmly into the bottom of your pie dish. I use a pyrex pie dish for mine. There is no need to pre grease the tray. Because this isn't baked it won't stick to the bottom. 

Place the base into the freezer while you prepare the filling. 

IMG_5671.JPG


Filling:

Soak your cashews over night ( for a raw version ) but if you aren't phased on if it is raw or not, you can fasten this process up by covering your cashews in boiling water and covering with a lid for an hour. 

Once your cashews are soaked, place in your high powered food processor with all the other ingredients and blend until smooth and airy. Now I was doing this in the food processor attachment of my Nutri ninja, but I noticed it was somewhat grainy in texture. So I transferred the contents to the Cup Blender ( Similar to the Nutri Bullet ) as it processes things much more fine. This is what gives the creamy texture instead of grainy. You can't do it in the cup processor first as it isn't big enough and your ingredients won't be evenly combined. It is well worth the extra dishes if its grainy, to transfer after the food processor to the cup processor like the Nutri Bullet and blend until no lumps remain. 

Pull the base from the freezer and pour in your filling. 

If you are going to decorate with the Raw Chocolate, place the pie into the fridge and let a skin develop on the top of the pie before you drizzle the chocolate over the top. This stops the chocolate from 'seeping' and making the pie top look messy. Then place a dollop of you Salted Caramel Sauce on top.


Place in the fridge for four hours or until set. You can also freeze the pie to make ahead and pull out and place in the fridge to thaw over night!

IMG_0379.JPG
fullsizeoutput_2a.jpeg


Healthy 10 Minute Pasta - For Kids!

IMG_7167.JPG

I think every parent has those days where you really CBF cooking... to the point that you're not even phased if you don't eat yourself. But then you remember that you have little humans that rely on you, and you can't just Not Adult... so you get your bum off the couch and make something simple. Maybe Toast. Maybe Eggs. Maybe even a bowl of cereal...perhaps you even opt for the greasiest and just do a take away night! After all... kids don't really mind do they? But for the rest of the night you feel a little bit guilty inside that you haven't fed them something as nutritious as what you probably could have. 

Well I don't know about you, but I felt like this  A LOT when I was pregnant with the twins and I still had to feed my 2 year old... and I'd been working all day. Because we follow an anti inflammatory lifestyle here, and we have many intolerances/don't keep junk food in the house and I refuse to give my family nasty cheap food - our take away is usually grill'd burgers. And believe me when I say - Holy shit that gets expensive! $50 minimum on takeaway to feed three of us... and because I could barely walk from being pregnant with twins, sadly this happened around 2-3 times a week. Bye Bye Money. I was like Beyonce throwing money at Maids... but I was throwing money at the waiters at Grill'd and making them feed me. 

So if you're a mum... a dad... a grand parent.. or a special person... and just want to SIT DOWN... may I suggest that you try this 10 minute pasta! Truth is, it only takes 10 minutes because that's how long the pasta takes to cook. The sauce itself is literally done in 5 minutes! You don't even have to chop anything. All you need is a blender or food processor... and a saucepan for the pasta of choice. 

We use Orgran Gluten Free Pasta for our son, Seth. It's made from Rice and Corn (I know not anti inflammatory however it does the job as a once off every now and then) and it comes in fun shapes! The pic above is their 'Out Back' animals pasta and Seth loves going through and looking at the Koala's and Kangaroos. So it's super fun for the tots! Not to mention, they also include spinach and other veggies in the pasta to make it fun colours. The sauce is also considered raw which is great because it means the nutrients in the vegetables are still intact and therefore packs a great nutritional punch. 

We don't eat dairy in this house, and the substitute I LOVE when it comes to cheese on pasta is Nutritional Yeast! It has the most wonderfully cheesy flavour but is packed with Protein and B Vitamins! I highly recommend it. Little mate thinks it's cheese ( the poor love haha) so he always asks for it on his meals. It really does contain great nutritional value and it's quite well priced! I usually use the Bragg's Nutritional Yeast, however Wholefood Merchants were out of Bragg's this fortnight so I am trying the Lotus brand... tastes the same and was a bit cheaper which is a win!

So here you go. Some relief for parents EVERYWHERE! It doesn't look the prettiest.. but hey it's gunna come out looking much worse... amirite?

As usual, let me know how you go if you give it a try and let me know what your little ones think! It really packs a punch of flavour and hey - why not even mix it through some Quinoa pasta for an easy meal for yourself?


Recipe

Serves - 2 - 

Time 10 Minutes

What you need:

Blender/NutriBullet/Food processor 

1 Organic Tomato

1 Clove Garlic

1 Handful Spinach Leaves

1 Teaspoon Tomato Paste

1/6 of an Onion (literally just a couple of Rings)

1/2 Teaspoon Italian Herbs (Oregano or Basil will work too)

1 Tablespoon Olive Oil

Nutritional Yeast

Salt & Pepper

1 Cup Animal Pasta (=2 Serves for small People)


What to do:

Put a saucepan of Water on and cook Pasta as per your Pasta packet instructions.      

While the water is boiling, in your blender add your Tomato, Spinach, Garlic, Onion, Herbs, Tomato Paste and tablespoon of Olive Oil and a pinch of Salt & Pepper. Blend until all combined. 

Once the pasta is cooked, scoop 1/2 cup of the Pasta water out and keep it in a cup to the side and then drain the Pasta.

Once the Pasta is drained, add it back to the Pot and pour the Sauce from the blender over the pasta. Mix well and then add the half a cup of pasta water. This will thin the sauce out and ensure it evenly covers the pasta. 

Serve into the bowls and top with Nutritional Yeast and Voila! 


I told you it was simple, didn't I? xx   

fullsizeoutput_2a.jpeg


Spicy Tomato, Mushroom and Basil Quinoa Pasta

IMG_5877.JPG

As we near the end of winter, I find myself cooking as much comfort food as possible before the hot weather begins. To me, comfort food screams PASTA! Probably why I've blogged two pasta recipes in the same week. 

When I originally found out I was celiac.... I think I literally mourned the loss of normal pasta. That's not even joke. I was genuinely upset! That's quite amusing now that I look back on the time, because I found Quinoa pasta and I reckon without doubt it is soooo much more yummy! It has a sweeter flavour to it and I find it has a nice bite if its cooked properly. 

It has been so long since I've enjoyed a bolognese, and that was another thing I was really sad about when I stopped eating meat. Bolognese sauce. My god. That stuff goes good with everything. When I was younger and just moved out of home, I used to batch cook bolognese like it was going out of fashion. Sometimes I would cook that much of it that I'd run out of pasta. So I would use the sauce as a dip. Seems weird... but it will actually rock your world without word of a lie! Cucumber in particular is amazing! Especially if you cut a cucumber in half length ways and scoop out the seeds. It's like a little bolognese boat! Really good! Anyway! I'm getting off topic!

When the meat vanished from my life, I started to really search into how I can make delicious pasta sauces and to my amazement, there are SO many combinations you can do and so many amazing vibrant ways that you can flavour olive oil that makes pasta delicious! 

Once again, if you aren't good with Quinoa, then Sub for a different type of spaghetti like Zoodles. ORRRRR there is this brand of 'spaghetti' in the health food aisle at woollies ( I think the brand is slendier ) and the pasta is made out of Konjac which is a root vegetable. Keto lovers rejoice because its only 10 calories per serve which means it is SUPER low carb!

So on with it today (this is the second time I've written this recipe blog because the first time I accidentally deleted it) I really do hope you enjoy this recipe. It is one of my families faves!


RECIPE

What you will need:

1/2 Pack Organic Quinoa Pasta (or Pasta of choice... NO GLUTEN...naughty naughty)

Good Quality Olive Oil on hand

4 Organic Tomatoes Quartered

1 Field Mushroom cut Chunky.

6-7 Fresh Basil Leaves chopped (dried just simply won't do)

Chilli Flakes

1 Small Onion diced

2 Cloves Organic AUSTRALIAN Garlic (2 cloves to me is like a bulb)

1/2 tablespoon Ghee


What to do:

Heat your pan and melt your half tablespoon of ghee

Saute your onion until translucent. I know you normally add Garlic here, but adding it at the end means it isn't as heat treated which keeps some of the benefits intact. 

While the Onion is cooking, put your water for your pasta in the pot and bring to a boil. Don't forget to season the water!

Once the onion is translucent, add your diced tomatoes and mushrooms. Sauté until the tomatoes are starting to break up. Add a little bit of water to deglaze the bottom of the pan if the food starts to catch. 

Once your water is boiling, add the pasta. 

To your sauce, add your chili flakes. Let cook for a few minutes to wake up the chilli. 

Add Garlic. Let cook for a couple of minutes and then turn off the heat. 

Once the heat is turned off, mix through the basil and add your olive oil. Enough to make it a sauce.

Once pasta is cooked, using tongs lift the pasta from the water and place in the pan of sauce. Don't worry about getting all the water off the pasta as the starch will combine with the oil and make the sauce a bit thicker and glossy.

eason with Salt & Pepper

Toss and Serve!


IMG_0197.PNG